

The Complete Guide to Wall Plastering in Singapore
The Complete Guide to Wall Plastering in Singapore: Why Your Walls Are Cracking & How to Fix It Published: July 2026 At a Glance / Quick Summary– The Core Issue: Hairline cracks and peeling paint on older HDB and Condo walls cannot be fixed by simply painting over them. The underlying concrete and plaster have degraded.- The Solution: Skim coating—a specialized process of applying a thin, smooth cementitious layer over the rough wall before painting.- Average Cost: $500 to $1,500 per room, depending on the severity of the damage and whether the entire HDB flat needs a full-wall skim coat.- Timeline: 2 to 5 days, including drying times between plastering layers and final painting. If you live in an older HDB flat or a condominium built before 2010, you have probably noticed it: those unsightly, spiderweb-like “hairline cracks” crawling across your living room wall. Or perhaps the paint near your skirting boards is constantly bubbling, flaking, and falling onto the floor. Most homeowners think this is a paint problem. They buy a bucket of premium paint, spend their weekend rolling it over the cracks, only to find the exact same cracks reappearing three months later. Here is the hard truth: You don’t have a paint problem; you have a plastering problem. In this complete guide, we will explain exactly why your walls are deteriorating, why painting over it is a waste of money, and how professional “skim coating” is the only permanent fix to achieving those flawlessly smooth walls you see in high-end showrooms. — 1. Why Are Your Walls Cracking and Peeling? Before you can fix the wall, you need to understand why it is breaking down. Walls in Singapore face a brutal combination of high humidity, structural settling, and age. Thermal Expansion & Contraction: Singapore’s climate is hot and humid. When you blast the air-conditioning at night and turn it off during the day, the concrete walls expand and contract microscopically. Over a decade, this constant movement cracks the brittle layer of plaster beneath your paint. Moisture Seepage: If your wall is shared with a bathroom or an external facade, microscopic moisture slowly penetrates the concrete. This moisture pushes outward, breaking the bond between the paint and the wall, leading to the dreaded “bubbling” and peeling effect. Settlement Cracks: All buildings settle over time. As the foundation shifts slightly, stress fractures appear on the weakest parts of the wall, usually above door frames and windows. [!WARNING]Never use standard “putty” or silicone fillers to patch large, recurring structural cracks. These fillers are inflexible and will simply crack again when the building shifts. You need a professional cementitious bonding agent. — 2. The Myth of “Painting Over It” When you hire a cheap, fly-by-night painter to refresh your old HDB, they will usually do a “touch up”. They scrape away the loose paint, slap on some cheap filler compound, sand it roughly, and paint over it. Because they didn’t treat the underlying structural weakness of the old plaster, the new wet paint actually accelerates the peeling process. The moisture from the new paint soaks into the old, degraded plaster, causing the entire patch to detach from the concrete wall. To fix a decaying wall permanently, you must go back to the bare concrete. This is where Skim Coating comes in. — 3. What is Skim Coating? (The Professional Plastering Method) Skim coating is a highly skilled plastering technique used to smooth out rough, damaged, or uneven concrete walls. It is the secret behind the flawlessly flat, matte walls you see in luxury hotels. The 4-Step Skim Coating Process: 1. Preparation & Scraping: The contractor aggressively scrapes away all existing flaky paint and degraded plaster down to the solid concrete substrate. 2. Sealer / Primer Application: A layer of oil-based or specialized water-based sealer is applied to bind the dusty concrete and block moisture from seeping outward. 3. The Skim Coat (Plastering): Using a wide trowel, a master plasterer applies a thin layer (2mm – 3mm) of specialized polymer-modified cement across the entire wall. This requires immense physical skill to ensure it is perfectly flat without trowel marks. 4. Sanding & Painting: Once the plaster cures into a rock-hard surface, it is sanded to a glass-like finish, primed, and painted with two coats of premium topcoat. PRO TIP:PRO TIP: If your contractor says they can finish plastering and painting an entire 4-room HDB in 2 days, run away. Proper skim coating requires at least 24 hours of curing time per layer before it can be sanded and painted. Rushing this process traps moisture and guarantees future peeling. — 4. Wall Plastering Cost Guide (Singapore) How much does it cost to fix your walls properly? Unlike standard painting (which is priced by the size of the flat), plastering and skim coating are highly labor-intensive and are usually priced based on the severity of the damage. Service Type Estimated Cost Best For Patch Plastering (Localized) $150 – $300 per spot Fixing localized water damage (e.g., near a window) or patching up holes left by removed aircon trunking. Full Wall Skim Coat (1 Room) $500 – $800 per room Bedrooms with extensive spiderweb cracks on all 4 walls, preparing for a high-end matte paint finish. Full House Skim Coat (3/4 Room HDB) $2,500 – $4,500 Older resale flats (20+ years old) where the original plaster is completely degraded and crumbling. Ceiling Plastering (Spalling Concrete) $300 – $600 per patch Bathrooms and kitchens where moisture has caused the ceiling concrete to break off, exposing rusted rebar. (Requires HDB-approved structural repair methods). Note: The prices above are estimates for the plastering works and usually do not include the final full-house painting package. — 5. Why Choose Nouvelle Workz for Your Plastering Needs? Wall plastering is an art form. A bad skim coat job will leave your walls looking wavy and bumpy—a defect that becomes painfully obvious the moment sunlight hits the wall at an angle. At Nouvelle Workz, our master plasterers have decades of experience

2026 HDB Painting Guide
2026 HDB Painting Guide: Why Does Your Paint Peel After Only 1 Year? At a Glance / Quick Summary Why do some HDB painting packages cost $500 while others cost $1,200?The secret lies in the preparation and the paint quality. Cheap contractors often skip the crucial “Sealer” (primer) layer and water down the paint to save costs, resulting in peeling paint, mold growth, and a strong formaldehyde smell within a year. A professional HDB painting service uses a proper sealer, 100% genuine odourless paint (like Nippon Paint), and includes full furniture protection and moving. A fresh coat of paint is the fastest and most cost-effective way to transform an old, tired HDB flat into a brand-new home. However, many homeowners fall into the trap of hunting for the cheapest painting flyer in their mailbox. You might think, “It’s just slapping paint on a wall, how different can it be?” The truth? Extremely different. Within 6 to 12 months, victims of “budget painters” start noticing their walls bubbling, paint flaking off, and terrifying black mold forming in the corners. In this 2026 guide, we expose the two biggest industry secrets cheap contractors use, and how to ensure your freshly painted home stays vibrant and healthy for the next 10 years. The Two Biggest “Budget Painter” Scams 1. Skipping the Sealer (The Root Cause of Peeling) The most important step in painting isn’t the paint itself-it’s the Sealer (also known as a primer). “Especially in older HDB resale flats or BTOs with bare concrete, the walls are highly alkaline and chalky,” explains James, Founder of Nouvelle Workz. “If you apply top-coat paint directly onto the wall without a sealer, the paint has nothing to grip onto. The alkaline moisture from the concrete will push the paint out, causing it to bubble and peel within months.” Cheap painters skip the sealer layer completely because it saves them hundreds of dollars in material costs and halves their working time. 2. Watering Down the Paint Have you ever wondered how a contractor can quote you $600 for a 4-room HDB flat when the raw cost of premium Nippon paint alone is almost $400? The dark secret is dilution. Unethical painters will take one bucket of high-quality paint and dilute it heavily with water to stretch it across three rooms. The result is a dangerously thin coat of paint that offers zero anti-mold protection, zero washability, and requires three layers just to hide the old wall color. The Professional Standard: How It Should Be Done When you engage a BCA-registered direct contractor like Nouvelle Workz for your HDB or Condo painting, you are paying for longevity, health, and peace of mind. Here is our non-negotiable process: 100% Genuine, Undiluted Paint: We use premium, authentic brands like Nippon Paint (Odour-less All-in-1). This ensures your home is free from toxic formaldehyde fumes, making it safe for babies, pregnant women, and pets on the very same day. Mandatory Sealer Application: We apply a high-quality water-based sealer base coat to neutralize wall alkalinity, ensuring the final color bonds permanently to the wall. Anti-Mold Protection: Singapore’s humidity is brutal. Our paints come with active anti-mold properties, crucial for bathrooms, kitchens, and poorly ventilated rooms. Complete Furniture Protection: You don’t have to lift a finger. Our crew professionally wraps all your furniture, beds, and floors in heavy-duty plastic sheeting before opening a single paint can, and shifts everything back perfectly when done. 2026 HDB Painting Cost Guide What is a reasonable price for a professional painting job that includes a sealer coat and genuine odourless paint? Here is a quick market estimate for standard HDB flats (including ceilings): HDB Flat Type Estimated Painting Cost (SGD) Days Required : **3-Room HDB** $1,000 – $1,300 1 – 2 Days **4-Room HDB** $1,300 – $1,600 2 – 3 Days **5-Room HDB / EA** $1,600 – $2,000 3 – 4 Days (Note: Prices fluctuate depending on whether the house is vacant, how many colors you choose, and if extensive wall plastering is required to fix deep cracks before painting.) Does Your Wall Have Cracks or Uneven Surfaces? If your older resale flat has uneven walls, holes from old cabinets, or spalling concrete, painting over it won’t hide the ugly bumps. Before applying the sealer, you will need a professional Wall Plastering (Skimming) service to make the walls perfectly smooth and flat like a brand-new BTO. As a full-suite direct contractor, Nouvelle Workz provides integrated plastering and painting packages, saving you the headache of coordinating multiple sub-contractors. Transform Your Home in Just 2 Days Don’t gamble with your family’s health and your home’s aesthetics by hiring fly-by-night painters. Do it right the first time. Ready for a Flawless, Odourless Finish? Send us your HDB floor plan or room photos for an instant, transparent quote. Free furniture shifting included! Contact Us Looking for professional help? Explore our top-rated HDB, BTO & Residential Renovation Services in Singapore, or view our latest Project Portfolio to see our workmanship.
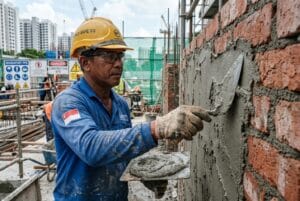
HDB Painting Cost (2026): Save 30% Direct Builder Rates | Nouvelle Workz
HDB Painting Cost (2026): Save 30% Direct Builder Rates Quick Answer: Repainting an HDB flat in Singapore does not require an HDB permit, but it must adhere to estate guidelines regarding color uniformity for external facades (such as balconies and window grilles). Hiring a professional hdb painting contractor ensures the use of certified eco-friendly Green Label paints (like nippon paint Singapore). To prevent paint peeling, a high-quality water-based wall sealer must be applied as a primer, especially on chalky resale flat walls. The average hdb painting cost Singapore ranges from SGD $1,200 to $2,800 depending on the flat size and paint quality selected. For kitchens and bathrooms, utilizing anti mould paint HDB is critical to prevent black spot growth. FTC Disclosure: Nouvelle Workz is a licensed building and renovation contractor in Singapore. By contacting our direct wall finishing and masonry teams through the links in this guide, you receive direct builder rates, saving on the typical 25% to 35% interior design agency management markup. Last updated: July 16, 2026 — Introduction: The Transformative Power of Paint Repainting is the most cost-effective way to refresh your HDB flat, protect concrete walls, and reflect your personal interior design style. Whether you are moving into a brand-new BTO unit or renovating an old resale flat, a fresh coat of paint instantly modernizes the space. However, wall painting is not just about choosing a color scheme from a catalog. Applying premium paint on a poorly prepared, chalky concrete surface will result in cracking, bubbling, and peeling within 12 months. Understanding paint chemistry—such as when to use oil-based versus water-based sealers, or selecting washability properties for high-traffic corridors—is key to a long-lasting finish. This comprehensive guide breaks down HDB painting options, detail preparation steps, itemized pricing logs, and expert tips for Singapore homeowners. — 1. HDB Painting Material & Scope Matrix Choosing the right paint for the right room ensures durability and prevents mold issues. Evaluate your options using the matrix below: Paint Selection Matrix Paint Type / Product Durability & Features Anti-Mould & Washability Price Range (SGD/flat project) Best Areas for Application Odorless Paint (Premium) Low VOC, zero paint smell during application. Moderate washability. SGD $1,500 – $2,500 Bedrooms, baby nursery, living room. Easy Wash / Teflon (Premium) High scrub resistance. Easy to wipe off crayon/dirt. High washability. SGD $1,600 – $2,700 Living room corridors, dining room. Anti-Mould Paint (Specialty) Prevents fungal spore growth in high humidity. Excellent moisture protection. SGD $1,200 – $2,100 Bathroom ceiling, kitchen walls. Wall Sealer / Primer (Base) Penetrates chalky walls to form a strong adhesive bond. Bonds loose powder. Included in premium packages Essential on raw plaster and old resale walls. Standard Acrylic (Budget) Economical, basic coverage. Low. Cannot wash. SGD $900 – $1,600 Rental properties, ceiling board. — 2. The Golden Rule of Painting: Why Sealers Matter Many homeowners try to save money by opting for a “2-coat topcoat only” painting package. This is a critical mistake, especially in resale flats. The Resale Flat “Chalking” Problem Over time, old HDB plaster wall paint degrades into a loose, powdery chalk layer. The Problem: If you apply new topcoat paint directly onto this powdery layer, the new paint sticks to the dust rather than the concrete wall. As the new paint dries and contracts, it will peel off in large sheets. The Solution: An hdb painting contractor must apply a penetrating wall sealer (primer) first. The sealer binds the loose powder particles together and creates a high-adhesion surface for the topcoat to cling to. Water-Based vs. Oil-Based Sealers Water-based sealers*: Best for new HDB BTO flats with fresh plastering. Low odor and fast drying. Oil-based sealers*: Best for old resale HDB flats with water stains, oil residue, or heavy chalking. They seal stains effectively but have a strong chemical smell that takes 2 to 3 days to dissipate. — 3. Step-by-Step HDB Wall Painting Workflow To achieve a flawless, streak-free finish, our professional painters Singapore follow a structured 4-step workflow: Step 1: Surface Protection & Masking All furniture is moved to the center of the room and covered with heavy-duty drop cloths. Floors are fully protected using plastic sheets taped securely along the skirting boards. Switches, sockets, and window frames are masked using painter’s tape. Step 2: Wall Repairing & Patching Old peeling paint is scraped off using metal scrapers. Hairline cracks, nail holes, and wall dents are filled with high-grade wall putty. Once dry, patched spots are sanded smooth to match the flat wall surface. Step 3: Primer / Sealer Application A single full coat of water-based or oil-based sealer is applied to all wall and ceiling surfaces. Allow the sealer to cure for 3 to 4 hours. Step 4: Double Topcoat Application Two coats of premium topcoat paint (such as Nippon Vinilex 5000 or Nippon EasyWash) are applied using rollers and brushes. Ensure a minimum of 2 hours drying time between coats for a rich, uniform color depth. — 4. Itemized HDB Painting Cost Log in Singapore (2026) Repainting budgets vary based on flat size and material selections. Below is the standard cost log for 2026: HDB Painting Price Log (Nippon Paint Premium) HDB Flat Size Number of Colors Allowed Cost with Sealer (SGD) Cost without Sealer (SGD) Average Timeline 3-Room Flat Up to 3 Colors SGD $1,300 – $1,700 SGD $1,000 – $1,300 2 – 3 Days 4-Room Flat Up to 4 Colors SGD $1,600 – $2,100 SGD $1,300 – $1,600 3 – 4 Days 5-Room Flat Up to 4 Colors SGD $1,900 – $2,500 SGD $1,500 – $1,950 4 Days Executive Mansionette Up to 5 Colors SGD $2,500 – $3,500 SGD $2,000 – $2,700 5 – 6 Days — 5. Direct Builder Value: Partnering with Nouvelle Workz Wall finishing requires meticulous surface preparation. By engaging Nouvelle Workz, you secure: Professional Painters: Our teams are trained in proper scraping, patching, and multi-layer rolling techniques, avoiding brush streaks and thin patches. Premium Materials: We use only genuine, non-diluted premium paints (like Nippon Paint) and high-solids sealers.
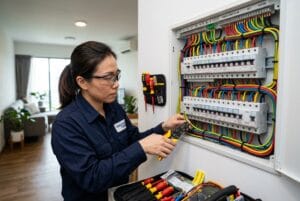
HDB Electrical Rewiring Cost (2026)
HDB Electrical Rewiring Cost (2026): Save 30% Direct Builder Rates | Nouvelle Workz Quick Answer: In Singapore, all HDB electrical rewiring works must be carried out by an ema licensed electrician (Licensed Electrical Worker – LEW). You do not need a formal HDB permit for basic rewiring or socket additions, but you must obtain an electrical permit Singapore or SP Services approval if you plan to upgrade your electrical load from 30 Amps to 40 Amps (common in older flats built before 1994). Laying cables inside concealed walls or hacking concrete walls to hide cables requires HDB hacking approvals. The average hdb rewiring cost Singapore ranges from SGD $3,000 to $7,500 depending on the flat size. A new db box installation (Distribution Board) with circuit breakers is standard during rewiring. FTC Disclosure: Nouvelle Workz is a registered building and renovation contractor in Singapore. By booking directly with our in-house licensed electrical and wet works teams through the links in this guide, you receive direct builder rates, saving on the typical 25% to 35% interior design agency management markup. Last updated: July 16, 2026 — Introduction: The Invisible Hazard in Older HDB Flats When buying an older resale HDB flat, many homeowners focus on visible aesthetics like kitchen countertops, custom wardrobes, and paint colors. We handle rewiring together with the rest of the flat through our HDB resale renovation contractor service. However, the most critical element of home safety is completely invisible: the electrical wiring hidden behind walls and inside PVC trunking. Electrical wiring does not last forever. Over a span of 15 to 25 years, the protective PVC insulation around copper wires degrades, cracks, and becomes brittle due to constant electrical current heat. This exposure increases the risk of short circuits, persistent power trips, and electrical fires. This comprehensive guide clarifies Singapore’s strict electrical safety rules, lists key warning signs that your HDB flat needs immediate rewiring, explains step-by-step installation checks, and provides an itemized cost log. — 1. HDB Electrical Rewiring Boundary Matrix Electrical installations are strictly regulated by the Energy Market Authority (EMA) to protect residents from safety hazards. The matrix below outlines common scopes, costs, and safety requirements: Electrical Rewiring Matrix Electrical Scope / Element Estimated Cost Range (SGD) EMA & HDB Rules Key Technical Requirement Complete HDB Flat Rewiring SGD $3,000 – $7,500 Must be done by an ema licensed electrician. All wiring must use certified PVC-insulated copper cables. DB Box Installation SGD $600 – $1,100 Mandated upgrade during complete rewiring. Must install a Residual Current Circuit Breaker (RCCB). Power Socket Addition (Double) SGD $80 – $130 No HDB permit required. Max 4 double sockets per circuit. Must comply with SS 145 British/Singapore standard. Concealed Wall Wiring SGD $1,200 – $3,500 Hacking concrete walls requires HDB structural permit. Conduit piping must be embedded in plaster safely. Conduit Trunking (Exposed) Included in basic package Allowed along walls. Must be neat and straight. High-impact PVC trunking to prevent mechanical damage. — 2. When Should You Rewire Your HDB Flat? Warning Signs How do you know if your flat is due for rewiring? Look out for these critical safety indicators: 1. Frequent Power Tripping (RCCB Tripping) If your distribution board’s Residual Current Circuit Breaker (RCCB) trips constantly, it indicates a current leakage. This occurs when live copper wires touch the grounding wire due to cracked insulation. 2. Discolored or Warm Power Outlets If a plastic wall socket looks yellowed, charred, or feels warm to the touch, it indicates loose wire connections. Loose wires generate high resistance, heating up the plastic and potentially starting a fire. 3. Faint Burning Smells or Buzzing Sounds A distinct fishy or burning plastic smell near switches or the DB box is a sign of overheating wires. A buzzing or crackling sound indicates active electrical arcing (sparks jumping between loose contacts). EXPERT CITATION ON HDB ELECTRICAL SAFETY James, Founder of Nouvelle Workz (Singapore M&E Engineering Lead):“In older Singapore resale flats, we frequently discover dangerous DIY wiring modifications made by previous owners. Some used substandard, thin speaker cables to power high-wattage air conditioners or instant water heaters, which literally melt the insulation inside the conduit. When we rewire, we use certified 2.5mm copper wires for standard power circuits and 4.0mm wires for heavy appliances, all certified under Singapore Standard SS 638. Never let an unlicensed handyman touch your DB box.” — 3. Step-by-Step Guide to HDB Electrical Load Upgrading For flats built before 1994, the default electrical service capacity is 30 Amps. To run multiple modern inverter air conditioners and storage water heaters simultaneously, you must upgrade your electrical load to 40 Amps. The Upgrading Workflow: Engage an LEW (Licensed Electrical Worker): Only an ema licensed electrician can submit the load upgrade application to SP Services. HDB Technical Review: HDB will verify if the building’s main electrical riser can support the additional power draw. Cable Pulling: The LEW will replace the main incoming power line from the HDB corridor service box to your home DB box with a thicker cable (usually 10mm or 16mm). Testing & Commissioning: The LEW conducts insulation tests and issues a Form CS/3 certifying safety compliance before SP Services turns on the upgraded power load. — 4. Itemized HDB Rewiring Cost Log in Singapore (2026) Plan your budget accurately using our direct builder electrical pricing logs: Electrical Installation Price Log Flat Type / Scope Exposed Trunking Cost (SGD) Concealed Wall Cost (SGD) Average Duration 3-Room HDB Flat SGD $2,800 – $3,800 SGD $4,200 – $5,800 3 – 5 Days 4-Room HDB Flat SGD $3,500 – $4,800 SGD $5,500 – $7,200 5 – 7 Days 5-Room HDB Flat SGD $4,200 – $5,800 SGD $6,800 – $8,800 6 – 8 Days New DB Box & MCBs SGD $650 – $950 Included in package 1 Day Instant Water Heater Point SGD $120 – $160 SGD $220 – $280 Included in timeline Air-Con Isolator (20A/30A) SGD $180 – $250 SGD $280 – $380 Included in timeline — 5. Direct Builder Value: Partnering with Nouvelle Workz
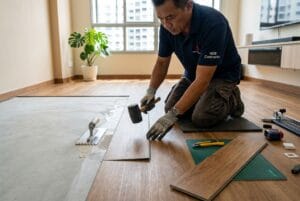
BTO Flooring Guide
BTO Flooring Guide: Choosing the Best Floor Finishes for Your Singapore Flat (2026) Quick Answer: In Singapore, installing new flooring in a new HDB BTO flat requires a formal hdb flooring permit if it involves hacking existing finishes or raising the floor level by more than 50mm (including screed and tiles). For brand new BTO flats delivered without flooring under the Optional Component Scheme (OCS), homeowners must apply for an hdb screeding permit to lay the cement screed base layer before installing vinyl or tiles. Under HDB regulations, toilet floors are subject to a 3-year waterproofing warranty period, during which hacking is strictly prohibited. Engaging an approved hdb bto flooring contractor ensures compliance with pre-packed material standards, with average flooring costs ranging from SGD $3.50 to $12.00 per square foot depending on materials. FTC Disclosure: Nouvelle Workz is a licensed building and wet works contractor in Singapore (HDB Registered Contractor HB-09-4089A). By coordinating directly with our in-house floor screeding and tiling teams through the links in this guide, you receive direct builder pricing, saving the typical 25% to 35% interior design agency management markup. Last updated: July 16, 2026 — Introduction: The Foundation of Your New Home Getting the keys to your new HDB BTO (Build-To-Order) flat is one of the most exciting milestones for Singaporean couples. As you step into the bare concrete unit, one of the first and most critical design decisions you will make is choosing your floor finishes. Your flooring is literally the foundation of your home’s aesthetics and daily comfort. It is also one of the most expensive and permanent components of your renovation. Replacing a poorly installed floor or fixing a waterproofing failure after moving in is a logistical nightmare that requires packing up all your furniture and moving out of the flat. This comprehensive guide covers everything you need to know about BTO flooring options, HDB regulations, floor thickness limits, permit workflows, and average installation costs. — 1. HDB BTO Flooring Options Comparison Matrix To make an informed decision, you must evaluate floor materials based on their durability, comfort, maintenance, and compliance with local building codes. Material Selection Matrix Flooring Material Comfort & Warmth Water Resistance Price Range (SGD/sqft) HDB Rules & Permits Luxury Vinyl Tiles (LVT / SPC) High comfort, warm underfoot. 100% waterproof options. SGD $3.50 – $6.50 Easy to lay. Requires pre-packed cement screed base. Homogeneous / Porcelain Tiles Cold underfoot, hard surface. Impervious to water. SGD $8.00 – $14.00 Excellent for kitchens and toilets. Requires tiling permit if hacking. Engineered Wood / Parquet High warmth, luxury feel. Moderate. Susceptible to swelling. SGD $12.00 – $20.00 Must use WELS-certified adhesives. Cannot be used in wet areas. Metallic Epoxy Flooring Seamless, highly customizable. 100% waterproof. SGD $14.00 – $22.00 Handled by specialized contractors. Great overlay option. Polished Cement Screed Industrial look, cool surface. Moderate. Needs sealant. SGD $7.00 – $11.00 Must comply with HDB pre-packed screed rules. — 2. Navigating HDB Flooring Permits & Screeding Rules Installing flooring in Singapore is strictly regulated by HDB to prevent structural overloading and water leakage into the flats below. The 3-Year Toilet Waterproofing Warranty Trap If you just collected your keys, HDB provides a 3-year warranty on toilet floor waterproofing. The Rule: You are strictly forbidden from hacking bathroom floor tiles within this 3-year period. Hacking the floor tiles will void the HDB warranty. The Solution: If you dislike the default HDB toilet tiles, your hdb bto flooring contractor can overlay new tiles or metallic epoxy directly on top of the existing tiles using special high-adhesion bonding agents. Pre-Packed Cement Screed Mandate To ensure high structural quality, HDB mandates that all floor screeding works in residential flats must use pre-packed screed instead of raw sand and cement mixed on-site. Pre-packed materials are pre-blended in a factory, ensuring consistent strength and reducing dust pollution. Your contractor must submit material delivery logs to HDB inspectors to prove compliance. — 3. Step-by-Step BTO Floor Installation Checklist A successful flooring installation involves careful coordination between material delivery, surface preparation, and laying. Step 1: Floor Levelling & Moisture Testing Before laying vinyl or engineered wood, the concrete slab must be perfectly flat. Your contractor will lay a pre-packed self-levelling screed layer. Vapor barrier*: Ensure a plastic underlay sheet is laid to prevent concrete moisture from rising and warping vinyl panels over time. Step 2: HDB Permit Notice Display Your contractor must display the HDB Renovation Permit outside your flat entrance throughout the flooring works. For tiling or hacking, neighbors must be notified at least 3 working days in advance due to noise. Step 3: Grouting & Expansion Joints When laying large tiles, ensure a minimum grout joint of 2mm to allow for thermal expansion. For vinyl, leave a 5mm gap along the perimeter wall covered by skirting boards, allowing the floor to expand and contract without buckling. — 4. Itemized Cost Log for Flooring Works in Singapore Understanding the average hdb flooring cost Singapore helps you plan your renovation budget effectively. Below is a standard cost log for 2026: Flooring Cost Log Flooring Work Phase Unit of Measurement Price Range (SGD) Average Duration Apply HDB Screeding Permit Per Flat Application SGD $150 – $250 3 – 5 Days Pre-packed cement screeding (BTO) Per Square Foot SGD $1.80 – $2.80 2 Days Lay luxury vinyl flooring (SPC) Per Square Foot SGD $3.50 – $5.50 2 Days Lay homogeneous floor tiles (60×60) Per Square Foot (Labor Only) SGD $6.00 – $9.00 4 Days Hacking existing tiles (non-toilet) Per Square Foot SGD $2.00 – $3.50 1 Day Professional tile grouting & washing Per Flat Project SGD $300 – $500 1 Day IMPORTANT DIRECT ANSWER EXPERT CITATION ON BTO FLOOR SCREEDINGJames, Founder of Nouvelle Workz (Singapore Flooring Specialist):“Many BTO owners try to cut costs by buying cheap vinyl flooring online and hiring ad-hoc workers to lay it. This is a recipe for disaster. If the underlying cement screed is not perfectly level, or if the moisture content of the screed is too
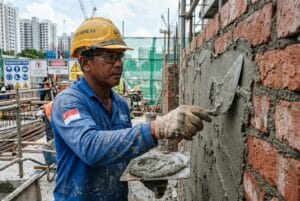
Plastering vs Skim Coating
Plastering vs Skim Coating: How to Fix Uneven Concrete Walls in Singapore Homes (2026) Quick Answer: In Singapore, plastering is a structural brick or concrete leveling process using a thick cement-sand mortar (typically 10mm to 20mm thick) to correct major plumb deviations. Skim coating is a cosmetic finishing process using a super-fine compound (typically 1mm to 3mm thick) to cover minor surface pores and create a perfectly smooth surface before painting. Professional wall plastering services in Singapore cost between SGD $3.50 to $7.00 per square foot, while skim coating ranges from SGD $1.50 to $3.00 per square foot. FTC Disclosure: Nouvelle Workz is a direct renovation builder and wet works contractor in Singapore. By consulting with our in-house masonry and plastering team directly through the links in this guide, you receive direct builder rates, saving on the typical 25% to 35% interior design agency management markups. Last updated: July 10, 2026 — Introduction: The Eyesore of Uneven Concrete Walls When you buy a brand-new HDB BTO flat, an older resale apartment, or a private condominium in Singapore, you expect your walls to be straight, smooth, and ready for painting. However, because most residential buildings in Singapore are constructed using precast concrete panels or cast-in-situ formwork, it is incredibly common to find walls that are bowed, wavy, or structurally out of plumb. If you paint directly over an uneven concrete wall, the flaws will become painfully obvious as soon as you turn on your ceiling lights or install track lighting. The spotlights will cast long, wavy shadows along the wall, ruining the premium look of your home. To solve this, homeowners must choose between plastering service options and skim coating Singapore applications. This guide outlines the difference between plastering and skim coating, details the step-by-step wall leveling workflow, analyzes typical local costs, and lists common defects to watch out for. — 1. What is Plastering vs Skim Coating? Many homeowners and even junior designers use the terms “plastering” and “skim coating” interchangeably. However, they are entirely different wet works processes with distinct materials, thickness limits, and structural purposes. Plastering (Thick Leveling) Plastering (also known as rendering) is a heavy-duty masonry process. It uses a thick mixture of Portland cement, fine sand, and water to correct major structural slope deviations (walls that are leaning or bowed). Plastering is applied to raw brick walls or rough concrete structural pillars. Skim Coating (Thin Smoothing) Skim coating is a cosmetic finishing process. It uses a pre-mixed, super-fine plastering paste (usually gypsum or acrylic-based, like Gyproc or skim coat compounds) to fill in minor scratches, hairline cracks, pinholes, and rough concrete textures. Skim coating is applied to already plastered walls or drywall partitions to create a smooth, paper-like surface before priming and painting. Plastering vs. Skim Coating Comparison Feature / Detail Plastering (Structural Leveling) Skim Coating (Cosmetic Smoothing) Material Base Portland Cement, Sand, Lime Gypsum, Acrylic, Fine Limestone Thickness Range 10mm to 25mm 1mm to 3mm Primary Goal Aligning walls, correcting structural tilt Removing minor surface roughness Substrate Compatibility Raw concrete, clay bricks, hollow blocks Plastered walls, drywalls, ceilings Typical Cost (SQFT) SGD $3.50 – $7.00 SGD $1.50 – $3.00 — 2. The Step-by-Step Wall Levelling Process Achieving a perfectly straight wall requires careful preparation and sequential application by a skilled plasterer contractor Singapore mason. The standard industry workflow includes the following phases: Phase 1: Surface Preparation Hack away any loose, flaking concrete or old peeling paint layers. Scrape off old wallpaper residues and sand down glossy oil paints. Clean the bare concrete substrate to remove dirt, grease, and structural dust. Phase 2: Applying Concrete Bonding Agent Paint a layer of specialized concrete bonding agent (such as Weldcrete or specialized acrylic primers) over the bare concrete wall. Why this matters*: Concrete is highly non-porous. Without a bonding agent, the wet cement mortar will not stick to the dry concrete wall, causing the plaster layer to hollow, crack, and peel off over time. Phase 3: Thick Plastering / Mortar Application Install vertical guide strips (plaster beads) using a laser level to establish a perfectly flat reference plane. Apply the cement-sand mortar between the guides using a hawk and trowel. Use a long aluminum straightedge (screed bar) to scrape off excess mortar and align the surface with the guide strips. Phase 4: Skim Coating for Finish Once the base plaster layer has cured completely (usually takes 24 to 48 hours), apply the first coat of skim coat compound. Apply a second, ultra-thin skim coat layer to fill in micro-pores. Why this matters*: Skim coating provides the final, non-porous smooth texture that prevents paint from absorbing unevenly. Phase 5: Sanding and Priming Hand-sand or machine-sand the wall using fine 180-grit to 220-grit sandpaper until it feels smooth to the touch. Apply one coat of high-quality wall sealer (primer) before applying the final coats of emulsion paint. — 3. Common Wall Defects in HDB and Private Condos If a contractor uses cheap materials or rushes the curing process, several common wall defects can appear: 1. Hollowing (Hollow Sounds) Symptom*: Tapping the wall yields a hollow, drum-like sound. Cause*: The plaster layer has detached from the concrete wall because the contractor skipped the concrete bonding agent or plastering mortar was mixed with too much water. 2. Hairline Cracks (Crazing) Symptom*: Fine, web-like cracks appearing across the wall surface. Cause*: The plaster dried too quickly under direct sunlight or wind, or the sand-cement ratio was incorrect. 3. Wavy Shadows (Poor Light Alignment) Symptom*: Wall looks smooth under diffuse daylight, but looks highly uneven and wavy under spotlights. Cause*: The contractor did not use laser levels or guide beads during the plastering phase, relying only on freehand smoothing. 4. Paint Peeling (Flaking) Symptom*: Paint peeling off in large sheets, bringing the skim coat layer down with it. Cause*: Painting over a damp, uncured plaster wall, trapping moisture behind the paint film. — 4. Budgeting: Plastering & Skim Coating Cost Breakdown To help you budget for your home renovation, below is the average

FSSD Fire Safety Compliance Checklist for Singapore Commercial Fit-Outs
FSSD Fire Safety Compliance: A Complete Checklist for Commercial Retail & Office Renovations in Singapore (2026) Quick Answer: In Singapore, FSSD compliance is the legal requirement under the Fire Safety Act to submit commercial building plans to the Fire Safety and Shelter Department (FSSD) of the Singapore Civil Defence Force (SCDF) for approval before starting any interior renovation or reinstatement. A professional fire safety submission Singapore project requires engaging a Qualified Person (QP)-either a Registered Architect or Professional Engineer (PE)-and typically costs between SGD $3,500 to $8,000 for consultations and submissions, taking 4 to 8 weeks to clear. FTC Disclosure: Nouvelle Workz is a direct renovation builder and commercial fit-out specialist in Singapore. When you consult with our in-house engineering and project management team directly through the links in this guide, you receive direct manufacturer rates, skipping intermediate agency markup fees. Last updated: July 10, 2026 — Introduction: The Crucial Importance of Fire Safety in Commercial Properties When embarking on a commercial retail fit-out or office renovation in Singapore, business owners and corporate tenants focus heavily on layout design, color schemes, office carpentry, and construction budgets. However, the single most critical factor that determines whether your project succeeds or faces expensive delays is FSSD compliance Singapore rules. In Singapore, the SCDF enforces strict guidelines under the Fire Code to ensure that all commercial units-including offices, retail shops, restaurants, and warehouses-provide safe exit routes, fire containment barriers, and active fire suppression systems. Starting demolition or partition works without prior FSSD approval is a criminal offense that can result in immediate stop-work orders, heavy court fines, and mandatory dismantling of unapproved fittings. This guide provides a comprehensive checklist of fire safety requirements, details the QP/RI submission workflow, and analyzes common code violations. — 1. What is FSSD Compliance? FSSD stands for the Fire Safety and Shelter Department, which is the specialized division of the SCDF responsible for auditing building plan submissions, conducting site audits, and issuing Fire Safety Certificates (FSC) to properties. Depending on the scale of your commercial renovation, your project will fall under one of two application pathways: Lodgement Scheme (Minor Works / LGM) For simple office layouts that do not involve altering exit routes, changing fire compartments, or relocating sprinkler mains, the Qualified Person (QP) can submit plans via the Lodgement Scheme. This pathway allows for instant automated registration on the SCDF portal, bypassing formal manual reviews and reducing clearance time. Full Plan Submission For complex renovations-such as building new meeting rooms, adding partitions that block line-of-sight to exit signs, relocating sprinklers, altering air conditioning ducts, or changing the use category of the unit (e.g., converting an office into a commercial kitchen)-a Full Plan Submission is mandatory. The plans are reviewed manually by an SCDF officer. Lodgement vs. Full Submission Matrix Feature / Detail Lodgement Scheme (Minor Works) Full Plan Submission QP Endorsement Required Yes (Architect or PE) Yes (Architect and PE) Typical Approval Timeline 1 to 2 Days (Instant auto-receipt) 3 to 6 Weeks (SCDF manual audit) Relocation of Sprinklers/M&E Allowed (Minor extensions only) Mandatory (Any main grid changes) SCDF Audit Probability Random (approx. 10% query rate) 100% (Every plan reviewed) Submission Fee (Government) Low (~SGD $150 – $300) Moderate (~SGD $500 – $1,200) — 2. When Do You Need FSSD Submission? A common mistake commercial tenants make is assuming that minor partition changes do not require a commercial renovation fire permit. To clarify this, you must file a fire safety submission Singapore application if your project includes any of the following scopes: Building New Partition Walls: Any drywall, gypsum wall, or glass partition that creates a new closed room (e.g., manager’s office, meeting room, server room). Altering Door Swing Directions: Changing the swing direction of exit doors, or installing new doors that block or narrow escape corridors. Relocating Fire Sprinklers: Relocating, adding, or deleting fire sprinkler heads to match new room layouts. Altering HVAC / Aircon Ducting: Changing the positions of air supply/return diffusers, or running new ducts through fire-rated walls. Relocating Smoke Detectors: Relocating smoke or heat detectors linked to the building’s central fire alarm panel. Adding Exit Signs: Relocating or adding green illuminated “EXIT” signs and emergency backup floodlights. — 3. Step-by-Step FSSD Submission Workflow Securing a Fire Safety Certificate (FSC) involves a multi-stage process with key milestones: 1. Engagement of a Qualified Person (QP) The tenant engages a Qualified Person (QP)-typically a Registered Architect for architectural layout submissions, and a Professional Mechanical & Electrical Engineer (PE) for fire sprinkler/smoke detector submissions. The QP conducts a site survey to verify the original building plans. 2. Plan Drafting and SCDF Code Compliance Review The QP drafts the proposed renovation plans, indicating partition locations, door fire-ratings (e.g., 30-minute or 1-hour fire doors), travel distances to exits, and M&E details. The QP checks that all designs comply with the latest SCDF Fire Code. 3. SCDF e-Submission and Plan Approval The QP submits the architectural plans (BP) and M&E plans (FP) to the SCDF portal. Once the SCDF approves the plans, they issue a Notice of Approval (NOA). IMPORTANT DIRECT ANSWER COMPLIANCE RULE: Demolition RestrictionUnder SCDF regulations, no physical construction, hacking, or partition building works can begin on site until the SCDF has officially issued the Notice of Approval (NOA). Starting work early can result in prosecution. 4. Site Execution and Mechanical/Electrical Inspections The renovation contractor executes the works according to the approved plans. Once construction is complete, testing is conducted on the fire sprinklers, alarm bells, and smoke detectors, ensuring they link to the building’s main fire panel. 5. Registered Inspector (RI) Site Audit & FSC Application The tenant appoints an independent Registered Inspector (RI)-one for architectural works (RI-Arch) and one for M&E works (RI-M&E). The RIs conduct a physical site inspection to verify that the built layout matches the approved drawings. Once the RIs sign off, the QP applies for the Fire Safety Certificate (FSC) through SCDF. The FSC is the final occupancy permit. 1. Engagement:Appoint a Qualified Person (QP) – Registered Architect or Professional Engineer

How to Choose a Custom Carpentry Contractor in Singapore
How to Choose a Custom Carpentry Contractor in Singapore: Direct Builder vs ID Agency (2026) Quick Answer: A direct carpentry contractor is a builder that owns and operates its own local woodwork workshop in Singapore, fabrication machinery, and team of carpenters. By hiring a direct contractor instead of an interior design (ID) agency, homeowners skip middleman markups of 20% to 35% and gain 100% direct control over edge banding quality, plywood grades, and hardware materials. FTC Disclosure: Nouvelle Workz is a direct renovation builder in Singapore with an in-house carpentry workshop. When you consult with our design and fabrication team through the direct links in this guide, you receive direct manufacturer pricing without any ID agency markups. Last updated: July 10, 2026 — Introduction: Custom Carpentry as the Core of Singapore Home Renovations In Singapore, where HDB flats and condominium units have standardized layouts and limited square footage, custom carpentry is the single most important element of a home renovation. It determines how efficiently your space is utilized, how much storage you have, and the overall visual aesthetic of your living spaces. From custom kitchen cabinets and TV consoles to floor-to-ceiling wardrobes and study desks, custom woodwork represents a significant portion of your total renovation budget—often accounting for 30% to 50% of the total cost. When embarking on a renovation, homeowners face a critical choice: should they hire an Interior Design (ID) agency to manage the project, or should they engage a direct carpentry contractor? While IDs offer project management and full-room styling, they outsource the actual woodwork to external carpentry subcontractors, adding a premium markup to the invoice. Engaging a direct contractor allows you to go straight to the source. This guide compares direct builders versus ID agencies, analyzes carpentry quality indicators, and provides a direct pricing breakdown for custom carpentry in Singapore. — 1. Direct Carpentry Contractor vs. Interior Design (ID) Agency To make the right choice for your budget and timeline, you must understand the operational differences between these two service models. What is an Interior Design (ID) Agency? An ID agency is a project management and design firm. They employ interior designers who draft 3D drawings, plan color schemes, coordinate subcontractors (plumbers, electricians, painters, and carpenters), and oversee the construction site. Because they do not own fabrication workshops or employ physical builders, they act as intermediaries. They source carpentry works Singapore services from third-party workshops and add a markup to cover their overheads, design fees, and profit margins. What is a Direct Carpentry Contractor? A direct carpentry contractor is a specialized builder that owns and operates its own fabrication workshop (either in Singapore or Johor Bahru) and employs full-time woodcraft artisans. They take measurements, fabricate the cabinetry in their workshop, and install the units directly in your home. They provide technical construction drawings (carpentry details) rather than full-room 3D interior design mockups. Their focus is on material quality, precision joinery, and structural durability. Side-by-Side Comparison Feature / Detail Direct Carpentry Contractor Interior Design (ID) Agency Middleman Markup 0% (Direct manufacturer rates) 20% to 35% (Outsourcing fee added to bill) Edge Banding Control 100% Direct (Overseen in-house) Indirect (Subcontractor decides quality) Material Transparency Verify exact plywood grades & glue types Relies on ID’s verbal descriptions Design Deliverables Detailed technical drawings & dimensions Full 3D renderings, mood boards, material boards Project Coordination Homeowner coordinates other trades ID coordinates all trades (full service) Production Speed Fast (Direct communication with workshop) Variable (Information flows through ID) — 2. The Danger of Middleman Markups The primary reason homeowners seek a direct carpenter Singapore specialist is cost savings. To understand where these savings come from, we must look at how ID agencies price custom joinery. When an ID agency quotes you for a 10-foot wardrobe, they do not calculate raw material and labor costs. Instead, they receive a sub-quote from their carpentry subcontractor (e.g., SGD $200 per run foot) and add a markup before presenting it to you (e.g., SGD $280 to $320 per run foot). For a standard HDB flat requiring a kitchen cabinet set, shoe cabinet, TV console, and wardrobe, the total carpentry run foot can easily accumulate to 60 feet. Hiring an ID Agency: 60 feet x SGD $280 = SGD $16,800 Hiring a Direct Contractor: 60 feet x SGD $200 = SGD $12,000 By choosing a direct carpentry contractor, you save SGD $4,800 on joinery alone. This budget can be reallocated to higher-quality materials (like sintered stone countertops), premium hardware, or smart home appliances. — 3. Quality Signposts: Edge Banding, Materials, and Hardware In custom cabinetry, the quality of what you cannot see determines how long your cupboards last. Two cabinets can look identical from the outside, but one will sag and peel in 3 years while the other remains perfect for 15 years. Edge Banding (Laser vs. Glue Line) Edge banding is the thin strip of plastic (usually ABS or PVC) applied to the raw edges of plywood panels to seal them. Poor Carpentry: Uses cheap hot-melt glue applied by hand or basic edge-banders. This leaves a visible dark glue line along the edge of the cabinet door. Over time, humidity dissolves the glue, causing the band to peel and allowing moisture to swell the plywood core. Premium Carpentry: High-end direct workshops utilize automatic laser edge-banding machines. The band is fused to the wood using a laser or hot-air system, creating a seamless, zero-joint finish with no visible glue lines. This provides a clean aesthetic and prevents moisture from entering the core. Plywood Grades Solid Plywood: The gold standard for carpentry contractor Singapore work. It consists of multiple layers of thin wood veneers glued together, alternating grain directions for maximum strength. It is highly resistant to sagging and warping. Blockboard / Particle Board: Avoid these for kitchen cabinets. Particle board (compressed sawdust and glue) swells rapidly when exposed to humidity, causing hinges to pull out of the soft core. Hardware and Hinges Cabinet doors are opened thousands of times. Cheap hinges lose tension, rust, or sag,
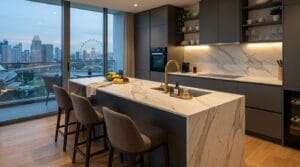
Why Sintered Stone is Replacing Quartz for Kitchen Countertops
For premium Singapore kitchen renovations, sintered stone is rapidly replacing quartz as the countertop material of choice. While quartz is highly durable, it contains plastic resins that scorch at temperatures above 150°C. Sintered stone, made from 100% natural minerals compacted under 25,000 tons of pressure and fired at 1200°C, is completely heat-proof, scratch-proof, and non-porous, making it the ultimate maintenance-free worktop. FTC Disclosure: Nouvelle Workz is a direct renovation builder in Singapore. By contacting our stone fabrication team directly through the links in this article, you get direct factory rates without interior design markups or middleman commissions. Last updated: July 10, 2026 — Introduction: The Countertop Evolution in Singapore Kitchens In Singapore, the kitchen island and countertop are the heart of the home. From preparing heavy Asian stir-fries to hosting social gatherings around a dry kitchen island, countertops are subjected to heat, sharp knives, staining spices like turmeric, and heavy impact daily. For the past decade, engineered quartz has been the default recommendation for modern HDB and condominium kitchen renovations. It solved the high maintenance and staining issues of natural marble while offering clean, modern colors. However, in 2026, a new material has taken over the luxury and mid-high residential market: sintered stone Singapore packages. Brands like Dekton, Neolith, and direct factory sintered stone slabs are showing up in premium BTO flats and landed properties alike. But why is sintered stone replacing quartz? Is it worth the higher price tag, and how does it perform in real-world Singaporean cooking environments? This guide provides an exhaustive head-to-head comparison to help you choose the right material for your kitchen renovation. — 1. Structural Science: Sintered Stone vs. Quartz Countertops To understand why these materials perform differently under heat and blade pressure, we must look at how they are manufactured. What is Quartz? Engineered quartz countertops are made by combining roughly 90% to 93% crushed quartz minerals with 7% to 10% polyester resins, binders, and pigments. The mixture is compacted under vacuum and vibration, then cured into solid slabs. The plastic resins bind the quartz together, giving it flexibility and sealing the surface. What is Sintered Stone? Sintered stone is made using a process called “sintering,” which mimics the natural formation of stone over thousands of years but accelerates it to hours. It is composed of 100% natural minerals (clays, feldspar, silica, and natural pigments). This dry powder is subjected to a massive press of 25,000 tons, compacting the minerals so tightly that air is completely expelled. The compacted slab is then fired in a kiln at temperatures exceeding 1200°C. Under this heat, the mineral particles fuse together at a molecular level, creating a rock-hard, ultra-dense slab without the need for plastic binders. Material Properties Comparison Performance Metric Sintered Stone Countertops Engineered Quartz Countertops Composition 100% Natural Minerals (0% Resin) 90-93% Quartz + 7-10% Polyester Resin Mohs Hardness Scale 7 to 8 (Harder than granite & steel) 6 to 7 (Hard, but can scratch) Water Absorption % < 0.05% (Ultra-low, impervious to liquids) < 0.1% (Low, but resins can stain) Maximum Heat Limit Up to 1200°C (Completely fire-proof) Up to 150°C (Resin melts/yellows under hot pans) UV Resistance 100% UV Stable (Will not fade in outdoor sun) Prone to fading/yellowing under direct sunlight Chemical Resistance Impervious to household bleach, acids, solvents Resins can be etched by strong chemicals — 2. In-Depth Head-to-Head Performance Evaluation How do these scientific differences translate to daily kitchen chores? Heat Resistance and Cooking Convenience Singaporean cooking often involves heavy cast iron pans, hot clay pots, and boiling water. Sintered Stone: Because it is fired at 1200°C, a sintered stone kitchen countertop is completely immune to thermal shock and direct heat. You can take a cast iron skillet straight off the induction hob and place it directly onto the countertop without a trivet. It will not crack, burn, scorch, or release chemical fumes. Quartz: The polyester resin binders in quartz countertops are a form of plastic. If you place a hot pot (above 150°C) directly on quartz, the heat will melt the resin, leaving a permanent yellow or brown burn ring that cannot be polished out. Homeowners with quartz must always use trivets or heat mats. Scratch and Impact Durability Cutting vegetables, slicing meat, and dropping heavy pots are normal kitchen events. Sintered Stone: With a Mohs hardness score of 7 to 8, sintered stone is harder than a stainless steel knife blade. You can cut, chop, and prepare food directly on the countertop surface without a cutting board. It will not scratch or dull. However, because it is extremely hard and rigid, it lacks flexibility. While it is highly resistant to surface scratches, it can chip along the edges if struck heavily with a hard metal object (like a cast iron pot corner). Quartz: Quartz has a hardness of 6 to 7. While it is highly scratch-resistant, cutting directly on it with a steel knife can scratch the resin layer over time, leaving dull gray score marks. Quartz is slightly more flexible than sintered stone due to its resin content, making it slightly less prone to edge chipping under light impacts. Stain Resistance and Food Safety Spilled coffee, curry powder, soy sauce, and red wine are common countertop stains. IMPORTANT DIRECT ANSWER EXPERT CITATION ON FOOD SAFETY & STAINING James, Founder of Nouvelle Workz (Singapore Interior Refurbishment Lead): “Singaporeans cook with highly pigmented ingredients like turmeric, chili oil, and dark soy sauce. Over time, the plastic resins in quartz countertops absorb these oils, leaving faint yellowish stains around prep areas that require chemical scrubbers to lift. Sintered stone has a water absorption rate close to zero (less than 0.05%). Even if you leave turmeric paste or red wine on a sintered stone countertop overnight, it cannot penetrate the surface. It wipes clean with water, making it a highly hygienic, food-safe surface.” Sintered Stone: Completely non-porous and chemically inert. It does not require sealing, does not release VOCs (Volatile Organic Compounds), and is certified safe for direct