
The Sintered Stone Revolution
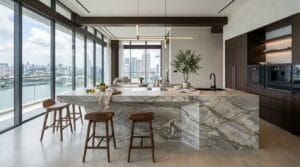
The Sintered Stone Revolution: Why It’s the Ultimate Luxury Choice for Kitchens At a Glance / Quick Summary – Unmatched Durability: Sintered stone is 100% heat-proof, scratch-resistant, and completely non-porous. – Aesthetics: Offers breathtaking large-format marble veining without the fragility or maintenance of natural stone. – Versatility: Perfect for kitchen islands, dining tables, bathroom vanities, and TV feature walls. For decades, natural marble and engineered quartz were the undisputed kings of luxury kitchen countertops in Singapore. But a new, superior material has taken the high-end interior design world by storm: Sintered Stone. If you are renovating a luxury condominium or a modern HDB, and you demand a surface that is as virtually indestructible as it is breathtakingly beautiful, sintered stone is the ultimate investment for your home. At Nouvelle Workz, we specialize in the seamless fabrication and installation of this premium material. What is Sintered Stone? Sintered stone is an engineered surface created through “sintering”—a high-tech process that mimics the natural formation of stone deep within the earth’s crust, but condensed into a matter of hours. Natural minerals (like granite, quartz, and porcelain clays) are subjected to extreme heat (over 1200°C) and immense pressure. The result? An ultra-compact, ultra-durable slab that outperforms almost every traditional countertop material on the market. Why High-End Homes are Switching to Sintered Stone 1. 100% Heat and Fire Proof Unlike quartz, which contains polymer resins that can burn or discolor when exposed to hot pots, sintered stone is completely heat resistant. You can place a scorching hot pan directly from the stove onto a sintered stone countertop without leaving a single mark or scorch ring. 2. Scratch and Stain Resistant Sintered stone is incredibly dense. It is almost impossible to scratch with standard kitchen knives. Furthermore, because it is 100% non-porous and resin-free, it will never absorb stains. Spilled wine, coffee, or turmeric? A simple wipe leaves the surface immaculate. 3. Stunning Large Format Aesthetics Sintered stone slabs are manufactured in massive formats, allowing for breathtaking, seamless kitchen islands and floor-to-ceiling feature walls. With ultra-HD printing technology, these slabs perfectly replicate the intricate veining of rare Italian Calacatta or Statuario marble, but without the fragility and high maintenance of natural stone. Handling and installing large-format sintered stone requires absolute precision and specialized craftsmanship. Beyond the Kitchen: Sintered Stone Applications While sintered stone is the undisputed champion of the kitchen, its versatility makes it perfect for other luxury applications: Dining Tables: Custom-fabricated sintered stone dining tables offer a stunning, indestructible centerpiece for your home. Bathroom Vanities & Walls: Its zero-porosity makes it completely waterproof and mold-proof, ideal for high-end hotel-style bathrooms. TV Feature Walls: A large format, book-matched sintered stone slab behind your TV instantly elevates the grandeur of your living room. A perfectly executed 45-degree mitered edge gives the illusion of a solid block of marble. Precision Craftsmanship by Nouvelle Workz Sintered stone is incredibly hard, which means it requires specialized diamond-tipped tools, precise cutting, and highly skilled craftsmen to fabricate and install without chipping or cracking. At Nouvelle Workz, our experienced masonry and carpentry teams work in tandem to deliver flawless sintered stone installations with perfect mitered edges and seamless joints. Upgrade to the future of luxury surfaces. Contact us today to incorporate Sintered Stone into your next renovation project!
Bespoke Carpentry in Singapore
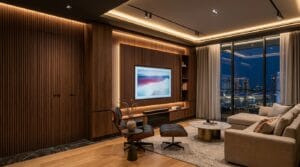
Bespoke Carpentry in Singapore: Elevating Your HDB & Condo with Luxury Built-ins At a Glance / Quick Summary – The Value of Bespoke: Custom carpentry offers seamless integration and maximizes space compared to off-the-shelf furniture. – Premium Materials: We use E0/E1 grade low-formaldehyde plywood and anti-fingerprint matte laminates. – Key Features: Hidden doors, fluted feature walls, and handle-less profiles are the hallmarks of modern luxury. In space-constrained Singapore, off-the-shelf furniture rarely does justice to a well-designed home. Whether you reside in a BTO flat or a luxury condominium, bespoke custom carpentry is the ultimate key to achieving a flawless, high-end aesthetic while maximizing every square inch of your living space. At Nouvelle Workz, we believe that true luxury lies in seamlessly integrated, made-to-measure woodwork that perfectly aligns with your lifestyle. Why Custom Carpentry Defines High-End Interior Design When you step into a premium hotel suite or a luxury penthouse, you rarely see standalone wardrobes or disjointed TV consoles. Instead, you see seamless integration. Custom carpentry allows for flush finishes, hidden doors, and floor-to-ceiling storage that creates an illusion of a larger, grander space. From handle-less kitchen cabinets to fluted wooden feature walls, bespoke woodwork brings architectural elegance to your interior. 1. Premium Materials: The Foundation of Luxury Not all carpentry is created equal. The difference between standard contractor work and high-end bespoke craftsmanship lies in the core materials and surface finishes: E0/E1 Grade Plywood: We prioritize ultra-low formaldehyde emission boards (E0/E1 grade), ensuring a healthier, odor-free environment for your family. Anti-Fingerprint & Matte Laminates: Say goodbye to smudges on your kitchen cabinets. We source premium, scratch-resistant laminates that offer a soft, tactile, and ultra-matte finish for that sophisticated touch. Heavy-Duty Soft-Close Hardware: We use industry-leading hinges and drawer runners (such as Blum or Hettich) that ensure silent, buttery-smooth operation for decades. Our skilled craftsmen meticulously assembling premium E0-grade woodwork. Key Areas to Invest in Custom Carpentry To maximize the visual impact and functionality of your renovation, consider these key carpentry features: The Flawless Feature Wall & Hidden Doors A floor-to-ceiling wooden feature wall in your living room instantly adds warmth and texture. By integrating a hidden door (concealed entry) into the fluted or paneled design, you can elegantly hide your bomb shelter, common bathroom, or bedroom hallway, creating an unbroken, cinematic aesthetic. The Bespoke Walk-in Wardrobe Transform your master bedroom into a luxury boutique with a customized walk-in wardrobe. We design intelligent storage solutions featuring tinted glass display doors, built-in LED sensor lighting, velvet-lined jewelry drawers, and pull-out organizers. The Chef’s Dream Kitchen Kitchen carpentry must balance extreme durability with stunning aesthetics. We design highly functional kitchen cabinets with intelligent corner-pullouts, integrated appliance housing, and sleek, handle-less profiles that make cooking a seamless experience. Notice the flawless edge banding and seamless matte finish—hallmarks of superior carpentry. The Nouvelle Workz Craftsmanship Guarantee Great design means nothing without impeccable execution. With our own dedicated team of master carpenters, we maintain absolute quality control over every joint, edge banding, and laminate finish. We ensure zero unsightly gaps, perfectly aligned cabinet doors, and a flawless handover. Ready to elevate your home with bespoke carpentry? Contact Nouvelle Workz today to discuss your custom storage and interior woodwork needs. Let us craft a space that is distinctively yours.

Retail Shop & Salon Renovation in Singapore
Quick Answer: Retail & Salon Renovation What makes a retail or salon renovation successful in Singapore? It requires three core pillars: High CRI (>90) lighting for visual merchandising, strict SCDF fire-safety compliance (fire-retardant materials), and URA Change of Use approval for medical or beauty services. Engaging an experienced retail renovation contractor in Singapore ensures off-site modular fabrication, slashing costly downtime and getting your shop open weeks faster. In the fiercely competitive retail and beauty industry in Singapore, your physical store is your most powerful marketing asset. Whether you are opening a high-end medical aesthetic salon in Orchard Road or a boutique jewelry store in a heritage shophouse, the interior design directly dictates how much customers are willing to spend. However, commercial retail renovations operate under completely different rules than residential homes. A delay of just two weeks can cost an entrepreneur tens of thousands of dollars in wasted commercial rent. In this 2026 guide, we break down the critical elements of a profitable retail fit-out—from visual merchandising lighting to navigating government statutory approvals with your shop renovation contractor. 1. The Science of Retail Lighting: CRI & Color Temperature In a residential home, soft ambient lighting is designed for relaxation. In a retail shop or beauty salon, lighting is a precision sales tool engineered for Visual Merchandising. If a customer tries on a luxury dress or tests a high-end foundation in your salon, but the lighting makes the fabric look dull or their skin look sallow, they will walk out empty-handed. High CRI (Color Rendering Index): Standard commercial LED panels have a CRI of around 70-80, which washes out natural colors. For boutiques and salons, you must demand CRI > 90 or CRI 95 track lights. High CRI lighting reveals the true, vibrant saturation of fabrics, jewelry, and skin tones. Color Temperature: We strongly recommend a 3500K to 4000K (Neutral-Warm White) spectrum. It hits the perfect balance—crisp and clean enough to evoke professional hygiene (essential for aesthetic clinics), yet warm and flattering enough to make clients feel beautiful in front of your mirrors. 2. Statutory Approvals: URA Change of Use & SCDF Fire Safety You cannot simply sign a retail lease and start knocking down walls. Commercial spaces are strictly regulated by government authorities to ensure public safety and zoning compliance. URA Change of Use If you are converting a traditional retail office into a beauty salon, facial clinic, or spa, you must check the Urban Redevelopment Authority (URA) zoning rules. Many commercial units require a formal Change of Use permit before medical or personal care services can be conducted legally. SCDF Fire Safety Clearance The Singapore Civil Defence Force (SCDF) maintains zero tolerance for fire hazards in public retail spaces. Fire-Retardant Materials: All timber partitions, display carpentry, fabric curtains, and carpets used in your shop must be accompanied by official fire-retardant laboratory certificates. Sprinklers & Detectors: If your renovation involves installing full-height glass partitions or gypsum rooms, you will alter the building’s ceiling layout. An SCDF-qualified specialist must relocate or add sprinkler heads and smoke detectors to ensure every new room is fully protected. 3. Estimated Retail & Salon Fit-Out Timelines (2026) In retail, speed is money. Here is a realistic timeline you can expect when engaging a direct retail renovation contractor using off-site fabrication techniques. Phase Estimated Duration Key Milestones Design & Statutory Approvals 2 – 4 Weeks URA Change of Use, SCDF plan submission, MCST permits. On-Site Wet Works & M&E 1 – 2 Weeks Flooring, electrical wiring, plumbing, and partition walls. Carpentry Assembly & Lighting 1 Week Installation of off-site fabricated display cabinets and CRI >90 track lights. Why Nouvelle Workz is Your Commercial Fit-Out Partner In retail, standard Ikea shelves will instantly cheapen your brand identity. You need custom-fabricated display carpentry engineered to showcase your hero products at eye level. To save precious renovation time, a professional retail renovation contractor will utilize off-site modular fabrication. While the electricians and plasterers are preparing your store’s ceiling and wiring on-site, our woodworking factory is concurrently building your display cabinets, reception counters, and styling stations. Once the wet works are done, the finished carpentry is transported and assembled on-site in a matter of days. We act as your turnkey commercial fit-out partner. Our dedicated project managers coordinate the entire bureaucratic maze of URA, BCA, and SCDF submissions on your behalf, delivering your shop strictly on schedule. Opening a New Retail Store or Salon? Maximize your sales with high-CRI commercial lighting and fast-track SCDF-compliant construction. Explore our Commercial Renovation Services or view our Project Portfolio. Send us your Floor Plan Contact Us
False Ceiling & L-Box Lighting Guide for HDB and Condo
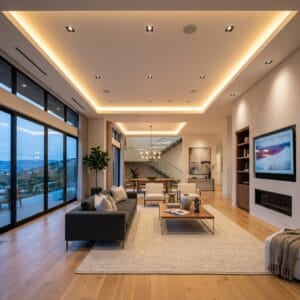
False Ceiling & L-Box Lighting Guide for HDB and Condo: Hiding Aircon Pipes in Style Published: July 2026 At a Glance / Quick Summary– Why False Ceilings? In Singapore HDBs and condos, false ceilings and L-Boxes are essential for hiding bulky overhead air conditioner piping (trunking), unsightly electrical conduits, and structural beams.- Cove Lighting Aesthetics: An L-Box allows you to install hidden LED strip lighting, creating a luxurious “indirect light” atmosphere that elevates the entire look of your home without blinding glare.- Ceiling Fan Support: Standard gypsum board cannot support the heavy, spinning weight of a ceiling fan. Your contractor must build a solid timber or plywood reinforcement support (box-up) inside the ceiling.- Access Panels: Never seal your aircon fan coil unit completely. A professional contractor will install discrete, flush access panels so technicians can easily service your aircon without hacking your plaster ceiling. When you walk into a newly renovated showflat or a high-end condominium, one of the first things you notice is the lighting. Instead of a single, harsh fluorescent tube staring down from the center of the ceiling, the room is bathed in a soft, warm, diffused glow emanating from hidden architectural recesses. This luxurious visual effect is achieved through False Ceilings and L-Box Light Troughs. Beyond pure aesthetics, false ceilings solve one of the biggest functional nightmares in Singapore interior renovation: hiding bulky overhead pipes. In this comprehensive guide, we explore how false ceilings work, design advice, and critical safety rules for homeowners. — 1. False Ceiling vs. L-Box: What is the Difference? While the terms are often used interchangeably, they serve different structural and budget purposes. Full False Ceiling: This is a secondary gypsum board ceiling suspended across the entire room, dropping your original structural ceiling height by about 4 to 6 inches. It creates a perfectly flat, monolithic surface where you can embed sleek, seamless downlights and hide all routing wires and pipes anywhere in the room. L-Box (Light Trough): An L-Box is built only along the perimeter edges of the room, leaving the original high ceiling in the center untouched. Because of its cross-sectional “L” shape, it creates a neat trough facing upwards, perfect for concealing LED light strips for indirect cove lighting. It is also more economical than a full false ceiling. — 2. Hiding Aircon Trunking and Structural Beams In Singapore HDB BTO flats and older resale units, air conditioner cooling pipes (trunking) must be routed from your bedrooms and living room all the way out to the condenser on the aircon ledge. Without a false ceiling, these thick PVC trunks run visibly across your walls and ceilings like giant white caterpillars, instantly destroying your interior design. A skilled interior contractor will design custom Pelmet Boxes and L-Boxes that run directly over the route of the aircon pipes. The ugly trunking is completely enclosed inside the gypsum structure, transforming an eyesore into an elegant architectural lighting feature. — 3. Critical Engineering: Ceiling Fans & Heavy Chandeliers One of the most dangerous mistakes an inexperienced renovator can make is screwing a heavy ceiling fan or chandelier directly into a standard gypsum plasterboard. Gypsum is a brittle plaster material; under the continuous vibration and torque of a spinning ceiling fan, the screws will pull out, and the fan can collapse. If you plan to install a ceiling fan or a heavy pendant lamp on a false ceiling, you must inform your contractor during the framing stage. Timber Reinforcement: The contractor must install a solid timber block or thick plywood structural bracket directly anchored to the concrete ceiling slab above* the gypsum board. The ceiling fan is then mounted securely through the plasterboard directly into this solid wood frame, ensuring 100% vibration-free safety. — 4. Maintenance & Access Panels (Manholes) Once your false ceiling is sealed and plastered, what happens when an air conditioning pipe leaks, or the wiring needs servicing? You should never have to smash open your ceiling to fix a leak. At Nouvelle Workz, we engineer hidden access panels (manholes) directly below critical junctions, valves, and aircon drainage pipes. These panels are designed with flush, minimalist aluminum frames that blend seamlessly into your ceiling, allowing future service technicians clean and immediate access without ruining your immaculate plasterwork. Want to Hide Ugly Pipes & Elevate Your Home’s Lighting? We specialize in flawless false ceiling construction, L-Box cove lighting, and custom aircon pipe concealment. Contact us today for a free quotation. Contact Us Looking for professional help? Explore our top-rated HDB, BTO & Residential Renovation Services in Singapore, or view our latest Project Portfolio to see our workmanship.
Smart Home Renovation & Electrical Guide in Singapore
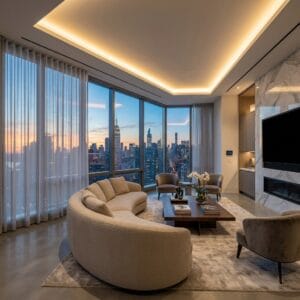
Smart Home Renovation & Electrical Guide in Singapore: Wiring, Switches & Automation Published: July 2026 At a Glance / Quick Summary – The Neutral Wire Rule: If you want smart switches (Zigbee/Matter/WiFi) that work flawlessly without flickering, your electrician MUST install a neutral wire in your switch boxes during the initial rewiring stage. – Concealed vs. Trunking: In resale flats, concealing messy wiring requires hacking grooves into the plaster and patching them up smoothly. In BTOs, clever carpentry or false ceilings are used to hide ugly cables. – Electrical Load Safety: Adding automated curtains, smart aircon controllers, and dozens of IoT sensors increases electrical draw. Always ensure your Licensed Electrical Worker (LEW) balances your distribution board (DB) safely. – Pro Contractor Value: A standard electrician only pulls wires; a modern interior renovation contractor plans your IoT ecosystem, switch heights, and data points before a single wall is hacked. In 2026, building a “smart home” in Singapore is no longer just a gimmick for tech geeks—it is the modern standard for convenience, energy efficiency, and luxury. Imagine walking into your home after a long day at work: with a single voice command or biometric door unlock, the air conditioner turns on, the motorized curtains glide shut, and your living room lights fade into a warm, welcoming glow. However, many homeowners make a fatal mistake: they buy thousands of dollars worth of smart switches and automated gadgets online, only to realize during renovation that their electrical wiring cannot support them. Building a true smart home is not an afterthought; it requires rigorous electrical planning during the rough-in (wiring) phase of your renovation. Here is everything you need to know about smart home rewiring in Singapore. — 1. The Golden Rule: Always Wire for a “Neutral Wire” In traditional Singapore HDBs and condos, standard light switches operate on a “No-Neutral” (single-live wire) system. The switch simply breaks or connects the live wire to turn the bulb on or off. Smart switches, however, are essentially miniature computers. They contain Wi-Fi, Zigbee, or Matter microchips that must remain constantly powered on—even when your lights are turned off—so they can receive wireless commands from your smartphone or voice assistant. If you do not have a Neutral Wire running to your switch box, smart switches will struggle to draw power. You will either be forced to install bulky, heat-generating “capacitors” in your ceiling lights, or suffer from ghostly flickering bulbs. PRO TIP: PRO TIP: When requesting a quotation from your renovation contractor, explicitly state: *”I want all light switch points pulled with Neutral Wires for smart home integration.”* This small upfront labor cost saves you from massive headaches and re-wiring expenses later. — 2. Concealing the Clutter: Data Points & Power Outlets A smart home requires significantly more power sockets and data (Ethernet/LAN) points than a standard home. Motorized Curtains & Blinds: You must pre-run power points near the top corners of your window frames, hidden neatly within the curtain pelmet (box). Mesh Wi-Fi Nodes: Wireless smart home gadgets rely on a rock-solid local network. We recommend pulling CAT6 or CAT7 LAN cables to central ceiling locations or high shelves to hardwire your Wi-Fi routers, eliminating dead zones without visible trailing wires. Robot Vacuum Docks: Modern robot vacuums have large self-emptying water stations. Designate a dedicated “parking spot” inside a custom carpentry utility cabinet with an internal power socket and floor-level clearance. — 3. Electrical Load & LEW Safety Compliance With motorized systems, high-end kitchen appliances, and always-on smart servers, your home’s total electrical consumption increases. In Singapore, all electrical installations must comply with strict Energy Market Authority (EMA) regulations. Never allow uncertified workers to tamper with your distribution board (DB box). A professional contractor will employ a Licensed Electrical Worker (LEW) to calculate your total amperage loading, upgrade your circuit breakers with proper Residual Current Circuit Breakers (RCCB), and ensure your smart home is 100% safe from short circuits and fire hazards. — 4. Why Nouvelle Workz is Your Smart Home Partner At Nouvelle Workz, we bridge the gap between traditional interior construction and cutting-edge home automation. We don’t just build walls and cabinets; our experienced project managers work closely with your smart home ecosystem (whether you use Apple HomeKit, Google Home, Xiaomi, or Home Assistant). We meticulously map out every neutral wire, concealed PVC conduit, motorized curtain pelmet, and IoT sensor placement before construction begins. The result is a breathtaking, clean interior where the technology is invisible, but the luxury is unforgettable. Planning a Smart Home Renovation? Ensure your electrical wiring is 100% ready for smart automation. Send us your floor plan for a free technical consultation and electrical layout review. 🔗 Related Guide: Electrical rewiring is just one part of the budget. See the full picture in our 2026 HDB Renovation Cost Breakdown. Contact Us

F&B Renovation Contractor Singapore: Exhaust & SFA Cost Guide
Quick Answer: F&B Renovation Essentials What do you need to open an F&B outlet in Singapore? A compliant F&B setup requires a commercial exhaust system with air scrubbers (ESP), an SFA/PUB-approved grease trap, and a 3-Phase power upgrade. Engaging an experienced F&B renovation contractor in Singapore ensures your design passes all SCDF (Fire Safety) and SFA inspections on the first try, preventing costly delays. Opening a restaurant, cafe, or central kitchen in Singapore is a dream for many aspiring entrepreneurs. You have perfected the menu and signed the lease for a beautiful shophouse or mall unit. But before you can serve a single plate of food, you must survive the F&B renovation process. Unlike a standard retail shop where you simply install some shelves and paint the walls, a commercial kitchen renovation is a complex web of civil engineering, high-voltage electrical works, heavy plumbing, and relentless government compliance. If your contractor fails an SFA or SCDF inspection, your opening day gets delayed by months while you continue paying exorbitant commercial rent. In this 2026 guide, we break down the critical compliance elements you must discuss with your F&B contractors. 1. The Lungs of the Kitchen: The Exhaust System If your restaurant involves heavy cooking (frying, grilling, wok-hei), a standard residential cooker hood will not work. You are legally required to install a commercial-grade Kitchen Exhaust System. This is often the most expensive single item in an F&B renovation. Custom Ducting: Huge galvanized steel ducts must be custom-fabricated to run from your kitchen hood all the way to the exterior of the building. Air Scrubbers: To prevent your neighbors from complaining about the smell of your food, the exhaust system must include electrostatic precipitators (ESP) or UV ozone systems to scrub the grease and smoke from the air before it is expelled. Fire Suppression: The SCDF mandates that commercial kitchen hoods must have an automated fire suppression system built directly into the canopy. If a grease fire erupts on the stove, it will automatically spray chemical foam to extinguish it. ⚠️ SCDF WARNING Do not try to save money by hiring an uncertified contractor to install your exhaust. If the ducting is not properly insulated or the air velocity is miscalculated, grease will accumulate inside the pipes, creating a massive fire hazard. SCDF inspectors will fail your site and you will not get your fire certificate. 2. The Unsung Hero: The Grease Trap When you wash heavily oiled commercial woks and plates, massive amounts of grease enter the sink. If this grease flows directly into the public sewer, it will solidify and cause massive blockages (fatbergs). The SFA and PUB strictly mandate the installation of an approved Grease Trap (also known as a grease interceptor) for all F&B premises. How it works: The trap slows down the flow of wastewater, allowing heavy food solids to sink to the bottom and lighter grease to float to the top. The relatively clear water in the middle is then discharged into the sewer. Maintenance: Your renovation contractor must install the grease trap in an accessible location because you will need to hire a licensed waste collector to pump out the trapped grease regularly. 3. High-Voltage Electrical Loading (3-Phase Power) A commercial kitchen consumes an astonishing amount of electricity. Commercial refrigerators, deep fryers, heavy-duty ovens, and massive exhaust fans will instantly trip a standard single-phase electrical board. You must upgrade the unit to 3-Phase Power. This requires a Licensed Electrical Worker (LEW) to submit a formal application to SP Group, draw up single-line diagrams, and upgrade your main distribution board (DB). This electrical upgrade alone can cost upwards of $3,000 to $10,000 depending on the total amperage required. 4. Estimated F&B Kitchen Setup Costs (2026) To help you budget for your restaurant setup, here are the estimated costs for core kitchen compliance elements when hiring a direct contractor. Setup / Installation Type Estimated Cost Notes Commercial Kitchen Exhaust + ESP Air Scrubber $6,000 – $15,000+ Highly dependent on ducting length and CFM capacity. PUB/SFA Approved Grease Trap $1,500 – $3,500 Includes stainless steel fabrication and plumbing diversion. 3-Phase Electrical Upgrade & LEW Submission $3,000 – $10,000 Mandatory for heavy-duty commercial appliances. Why Nouvelle Workz is Your Preferred F&B Contractor Building a restaurant is a race against the clock. Every day your renovation is delayed is a day of lost revenue and wasted rent. At Nouvelle Workz, we don’t just build beautiful dining rooms; we build high-performance commercial kitchens. As an experienced direct F&B renovation contractor, we handle the entire labyrinth of SFA, SCDF, and URA submissions in-house. From installing anti-slip epoxy flooring and heavy-duty grease traps, to fabricating custom stainless steel exhaust canopies, we ensure your F&B outlet passes every inspection on the very first try. Opening a New Restaurant or Cafe? Ensure your setup is 100% compliant with SFA and SCDF regulations and passes inspection on the first try. Explore our Commercial F&B Renovation Services or view our Project Portfolio. Send us your Floor Plan

SPC Vinyl Flooring vs. Porcelain Tiles
SPC Vinyl Flooring vs. Porcelain Tiles: Which is Best for Your HDB or Condo? Published: July 2026 At a Glance / Quick Summary– SPC Vinyl Flooring: Fast to install (overlay), 100% waterproof, warm to the touch, and highly affordable. Best for living rooms and bedrooms.- Porcelain Tiles: Incredibly durable, scratch-resistant, and cool to the touch. Best for kitchens and bathrooms where heavy washing is required.- Average Cost: SPC Vinyl ranges from $4.50 to $7.00 PSF (including installation). Porcelain tiles range from $8.00 to $14.00+ PSF (including cement screeding and hacking).- The Decision: If you are renovating a resale flat and want a completely new look without the massive cost of hacking old tiles, SPC overlay is the absolute winner. The floor is the largest visible surface in your home. It sets the entire aesthetic tone of your interior design, from Scandinavian warmth to industrial chic. For decades, the standard in Singapore HDBs and condominiums was the glossy porcelain tile. But in recent years, a revolutionary new material has taken the renovation market by storm: SPC (Stone Plastic Composite) Vinyl Flooring. If you are planning a renovation, you are likely agonizing over which material to choose. In this guide, we break down the pros, cons, and true costs of SPC Vinyl versus Traditional Porcelain Tiles to help you make the perfect decision for your lifestyle. — 1. What is SPC Vinyl Flooring? Do not confuse modern SPC with the cheap, peeling plastic vinyl sheets of the 1990s. SPC stands for Stone Plastic Composite. The core of the plank is made from natural limestone powder blended with polyvinyl chloride, making it incredibly dense, rigid, and 100% waterproof. The Pros of SPC The “Overlay” Advantage: Because SPC planks use a “click-and-lock” system, they can be installed directly over your existing tiles. This saves you thousands of dollars and weeks of time, as you completely bypass the noisy, dusty, and expensive tile hacking process. Aesthetic Warmth: SPC perfectly mimics the look and texture of natural timber. Unlike cold, hard tiles, SPC feels slightly softer and warmer underfoot, making it perfect for bedrooms and homes with toddlers or elderly residents. Waterproof: Unlike traditional laminate flooring (which swells when wet), SPC is completely waterproof. You can mop it daily without fear of warping. The Cons of SPC Scratch Resistance: While modern SPC has a tough wear-layer, it is still a composite plastic. Dragging heavy, sharp furniture (like a metal dining chair without felt pads) across the floor will scratch it. Subfloor Flatness: Because SPC is overlaid, your existing floor must be reasonably flat. If your old tiles are badly popping or uneven, the contractor must apply a self-leveling compound first, which adds to the cost. — 2. The Case for Porcelain Tiles Porcelain tiles are made from refined clay baked at extremely high temperatures. They are the traditional heavyweights of the flooring world. The Pros of Tiles Indestructible: High-quality porcelain tiles are virtually scratch-proof and dent-proof. They can easily last 30 years without losing their finish. Cooling Effect: In Singapore’s tropical climate, tiles remain wonderfully cool to the touch. Heavy Washing: For wet kitchens or bathrooms where you want to aggressively scrub the floor with harsh chemicals and copious amounts of water, porcelain is the only logical choice. The Cons of Tiles Grout Maintenance: The biggest nightmare of tiled floors is the grout lines. Over time, white grout turns black from dirt and mold, requiring intensive scrubbing to keep clean. High Cost and Mess: Installing new tiles in a resale flat requires hacking the old floor to the bare concrete, pouring new cement screed, and laying the tiles. It is incredibly dusty, noisy, and takes weeks. — 3. 2026 Flooring Cost Comparison (Singapore) How much does it actually cost? Here is a breakdown for a typical 4-Room HDB flat (approx 90 sqm / 960 sqft of flooring): Flooring Type Estimated Total Cost (Material + Labor) Notes SPC Vinyl (Overlay) $4,500 – $6,500 Fast installation (3-4 days). No hacking required. Includes skirting. Porcelain Tiles (Hacking & Screeding) $9,000 – $14,000 Requires HDB hacking permits, heavy debris disposal, and 2-3 weeks of labor. Note: If you are renovating a brand new BTO flat where the floor is bare concrete, the cost gap narrows because you do not need to pay for hacking old tiles. However, you must still pay for cement screeding before laying either tiles or SPC. — 4. The Verdict: Which Should You Choose? Our professional recommendation at Nouvelle Workz: Use a Hybrid Approach. Use SPC Vinyl in your living room, dining area, and bedrooms to create a warm, seamless, and luxurious aesthetic while saving thousands of dollars on hacking. Reserve Porcelain Tiles strictly for your kitchen, bathrooms, and service yard where heavy moisture, aggressive washing, and cooking oil spills are common. Need Help Deciding on Your Flooring? We supply and install premium 5mm-thick SPC vinyl and high-grade Italian porcelain tiles. Send us your floor plan for a free technical assessment and quotation. Contact Us Looking for professional help? Explore our top-rated HDB, BTO & Residential Renovation Services in Singapore, or view our latest Project Portfolio to see our workmanship.
Commercial Flooring Guide
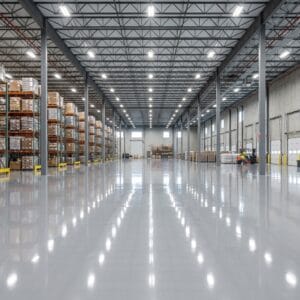
Commercial Flooring Guide: Why Epoxy & PU Are Essential for F&B and Warehouses Published: July 2026 At a Glance / Quick Summary– The Problem with Standard Tiles: Ceramic tiles have grout lines that trap bacteria, mold, and grease, often failing Singapore Food Agency (SFA) inspections in commercial kitchens.- The Solution: Epoxy or Polyurethane (PU) resin flooring creates a 100% seamless, non-porous, and highly durable surface that is anti-slip and chemical resistant.- Average Cost: $3.50 to $8.00 per square foot (PSF), depending on the thickness of the coating, the condition of the existing concrete, and whether heavy-duty PU is required.- Curing Time: Rapid-cure systems can be ready for light foot traffic in 24 hours, minimizing costly operational downtime for businesses. For commercial spaces in Singapore-whether it is a high-volume central kitchen, an automobile workshop, or a sprawling logistics warehouse-the floor is the most abused structural element of the building. It endures the relentless scraping of forklift tires, the spilling of boiling cooking oil, the dropping of heavy metal tools, and aggressive daily chemical washing. If you install standard residential flooring (like ceramic tiles or vinyl) in a heavy commercial setting, it will crack, peel, and become a severe safety hazard within six months. In this guide, we explore why Epoxy and Polyurethane (PU) flooring systems are the gold standard for commercial and industrial businesses, and how they protect your workers, your inventory, and your licensing compliance. — 1. Why Tiles Fail in Commercial Kitchens (SFA Compliance) Many new restaurant owners make the mistake of using standard ceramic tiles for their kitchen floor to save money. This is a disaster waiting to happen. The weakness of a tiled floor lies in its grout lines. Grout is inherently porous. In a bustling F&B kitchen, hot oil, blood, and food juices constantly spill onto the floor. These organic liquids seep deep into the grout lines, rotting from the inside out and breeding severe bacterial colonies. When the Singapore Food Agency (SFA) conducts a hygiene inspection, blackened, greasy grout is an immediate red flag that can result in hefty fines or a suspended license. [!WARNING]Furthermore, when grease mixes with soapy water during cleaning, smooth ceramic tiles become highly slick. Slip-and-fall accidents in commercial kitchens lead to severe worker injuries, medical leave disruptions, and massive liability claims against the employer. — 2. The Superiority of Epoxy and PU Flooring Epoxy and PU are liquid-applied resin systems that cure into a solid, impenetrable plastic-like shield over your concrete floor. 100% Seamless and Hygienic Because it is poured as a liquid, an epoxy floor has zero joints or grout lines. It creates a continuous, completely non-porous surface from wall to wall. You can literally hose down the entire kitchen or warehouse floor, and all the water and grease will glide effortlessly into the drainage traps without penetrating the surface. Anti-Slip Safety Profiles Commercial flooring contractors can broadcast silica sand or quartz aggregate into the wet resin before it cures. This gives the floor a highly textured, sandpaper-like finish, ensuring that your workers will not slip even if the floor is drenched in water or oil. Extreme Impact and Chemical Resistance A high-build epoxy or PU screed can withstand the immense point-load pressure of a 5-ton forklift without cracking. It is also highly resistant to harsh industrial chemicals, meaning battery acid spills or aggressive alkaline cleaners will not eat away the floor. — 3. The Professional Application Process Applying commercial epoxy is not like painting a wall; it is a highly sensitive chemical engineering process. 1. Diamond Grinding: The most critical step. The contractor uses heavy machinery to grind away the top layer of the existing concrete. This removes old contaminants and opens up the concrete’s pores so the epoxy can bond at a molecular level. 2. Moisture Barrier Primer: A specialized primer is applied to stop underground moisture from pushing up and causing the epoxy to blister or peel. 3. The Base Coat & Broadcast: The thick resin is poured and squeegeed across the floor. Anti-slip aggregates are broadcasted into the wet layer. 4. The Topcoat: A highly durable, UV-resistant clear or colored topcoat is applied to seal the aggregates and provide the final glossy or matte finish. PRO TIP:PRO TIP: If a contractor tells you they can apply epoxy directly over your old, dirty concrete without grinding it first, fire them immediately. The epoxy will peel off in sheets within weeks because it has nothing to grip onto. Proper surface preparation accounts for 60% of the labor in a good epoxy job. — 4. 2026 Commercial Flooring Cost Guide (Singapore) Pricing for commercial flooring is highly dependent on the total square footage (larger areas have a lower PSF cost) and the required thickness of the coating. Flooring System Estimated Cost (PSF) Ideal Application Thin-Coat Epoxy (Roller Applied) $2.50 – $4.00 PSF Light foot traffic, pedestrian walkways, small retail stores, server rooms. High-Build Epoxy (Trowel Applied) $4.50 – $7.00 PSF Medium industrial use, warehouses with forklift traffic, automotive workshops, showrooms. Heavy-Duty PU Screed (4mm – 6mm) $8.00 – $12.00+ PSF Commercial central kitchens, food manufacturing plants, cold rooms (resists extreme thermal shock from boiling water to freezing cold). — 5. Why Trust Nouvelle Workz for Your Commercial Flooring? Commercial downtime is incredibly expensive. If you have to close your factory or restaurant for two weeks because a cheap contractor botched the floor and has to redo it, the lost revenue far exceeds the cost of the renovation itself. At Nouvelle Workz, we understand the urgency of commercial operations. As a BCA-registered direct builder, our specialized flooring teams use state-of-the-art dustless grinding equipment and rapid-cure resins to complete your project with minimal disruption. We guarantee a flawless, SFA-compliant, and heavily durable floor that will serve your business for years. Upgrade Your Commercial Floor Today Stop risking SFA fines and worker injuries. Send us the floor plan of your commercial space for a free technical assessment and direct-contractor quotation. Contact Us Looking for professional help? Explore our top-rated Commercial
HDB Kitchen Renovation & Open Concept Guide
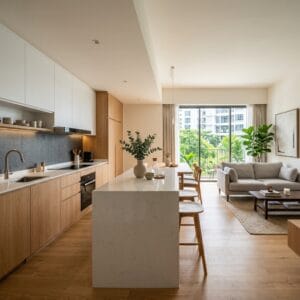
HDB Kitchen Renovation & Open Concept Guide: Hacking Walls & Avoiding Disaster Published: July 2026 At a Glance / Quick Summary– The Open Concept Trend: Hacking the kitchen wall to create an open-concept kitchen with an island is the #1 request for new BTO and resale HDB renovations.- The Hacking Rule: You CANNOT hack load-bearing walls. A Professional Engineer (PE) endorsement and HDB permit are mandatory before a single hammer swings.- Average Cost: $5,000 to $12,000 depending on hacking extent, custom carpentry (cabinets), and countertop materials (e.g., Quartz vs. KompacPlus).- The Waterproofing Danger: Just like bathrooms, kitchens are wet areas. Hacking floor tiles incorrectly can destroy the waterproofing membrane, leading to leaks and massive fines. The kitchen is the beating heart of any Singaporean home. Today, the claustrophobic, enclosed kitchens of 1990s HDB flats are out. The modern standard is the Open Concept Kitchen-a bright, airy space that flows seamlessly into the living room, often anchored by a sleek island counter where you can host friends or help kids with their homework while cooking. But achieving this magazine-worthy look requires brute-force demolition. Hacking walls and floors in an HDB flat is not a DIY weekend project; it is a highly regulated structural engineering task. In this guide, we will walk you through the real costs, the strict HDB hacking rules, and the hidden pitfalls of kitchen renovations that can turn your dream home into a structural nightmare. — 1. The Rules of Hacking: What You Can and Cannot Demolish Before you finalize your beautiful open-concept 3D rendering, you must consult your flat’s structural floor plan. HDB flats are held up by a combination of beams, columns, and load-bearing walls (indicated by thick black lines on your floor plan). You can NEVER hack a load-bearing wall. Doing so compromises the structural integrity of the entire building block. HDB will prosecute and heavily fine any homeowner and contractor who touches a load-bearing structure. Non-load-bearing walls (indicated by thin lines) can usually be hacked, either partially (for a half-glass partition) or fully (for a complete open concept). [!WARNING]Even for non-load-bearing walls, you cannot simply start hacking. You must submit an application to HDB, often requiring the endorsement of a Professional Engineer (PE). Only a BCA-registered contractor can legally execute the demolition. — 2. Kitchen Floor Hacking and the Waterproofing Trap Many homeowners want to change their ugly old kitchen floor tiles. If you live in a new BTO (less than 3 years old), HDB strictly prohibits hacking the bathroom and kitchen floor tiles. You are only allowed to overlay new tiles on top of the existing ones. This is to protect the original HDB waterproofing membrane. If you live in a resale flat and choose to hack the kitchen floor, you are stripping away the old waterproofing. If your contractor fails to apply a new, high-quality waterproofing membrane before laying your new tiles, the water from mopping or washing your kitchen will seep through the concrete slab and ruin the ceiling of the neighbor directly below you. Under HDB rules, you will be liable to pay for all repairs to your neighbor’s flat, plus the cost of re-hacking your own brand new kitchen to fix the leak. — 3. 2026 Kitchen Renovation Cost Breakdown Kitchens are expensive because they are dense. In a small space, you are packing in heavy carpentry, plumbing, electrical appliances, and stone countertops. Here is a realistic budget for a full kitchen overhaul: Component Estimated Cost Notes Hacking (Walls & Floor) $1,200 – $2,500 Includes PE endorsement fees and debris disposal trucks. Masonry & Waterproofing $1,500 – $3,000 Re-screeding the floor, applying waterproofing, and laying new tiles. Custom Cabinetry $120 – $180 per foot run High-pressure laminate, soft-close hinges (e.g., Blum), and anti-termite plywood. Countertops $90 – $150 per foot run Quartz is the standard for durability. Sintered stone (Dekton) is premium. Plumbing & Electrical $500 – $1,000 Shifting the sink pipes, adding heavy-duty power points for ovens and hobs. Total Estimated Budget: $6,000 – $15,000+ depending on the length of your cabinets and whether you build an island. — 4. Why Nouvelle Workz is Your Best Choice An open-concept kitchen requires perfect coordination between the demolition team, the plumber, the electrician, and the carpenter. If the plumber installs the pipes 2 inches off-center, the custom cabinets will not fit, delaying the project by weeks. At Nouvelle Workz, we are a BCA-registered direct builder. We don’t just outsource jobs to random handymen. Our in-house project managers ensure that your HDB hacking permits are approved swiftly, our waterproofing passes strict flood tests, and our carpentry fits with millimeter precision. Ready to Build Your Dream Kitchen? Don’t let hacking regulations delay your renovation. Send us your HDB floor plan today for a free structural assessment and a direct-contractor quotation. Contact Us Looking for professional help? Explore our top-rated HDB, BTO & Residential Renovation Services in Singapore, or view our latest Project Portfolio to see our workmanship.